Attachment Methods
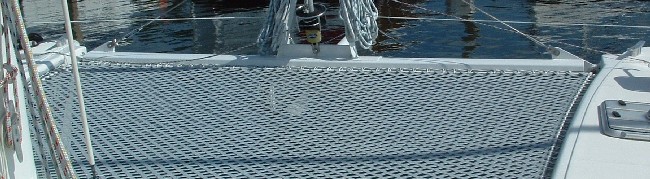
Netting Attachment Systems
Proper net attachment hardware is essential to getting a good tight
fitting net. This hardware must be strong enough to hold the high loads that the net will place
on it, and allow the net to be easily tensioned.
more details
X
Attachment hardware can be divided into groups that allow for tensioning and
those that do not. Also tensioning hardware can be divided into flexible methods,
where the lacing attachment points can be moved, and fixed methods where the
attachment points are not movable.
Tensioning is usually accomplished by lacing with line between the net and
attachment points on the boats structure. Depending on the netting material
at least 1 or 2 sides of the attachment system will need to have tensioning
hardware, and in many cases it works best to have tensioning on all 4 sides.
Flexible lacing points are desirable for mesh and open net where a border is
built into the net with grommets or sleeve cutouts. With a fixed hardware method,
these borders will need to closely match the locations of the attachment hardware.
Webbing nets with battens, can be laced at any exposed spot on the battens,
and attachment hardware locations will not need to be matched.
Listed below are some of the net attachment methods that we are aware
of that work. Most boats will use a combination of these different methods
to create an attachment system that works with the existing structure
of the boat and the type of netting to be used.
Deck and Hull track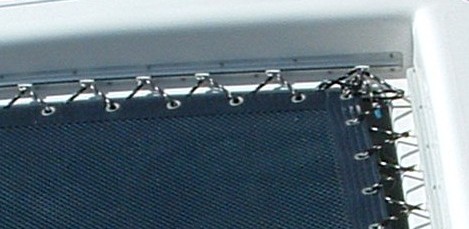
These are heavy wall aluminum tracks that can be screwed, bolted or
riveted to the boats hulls, decks, or beams. These can be used with
a boltrope sewn in to the border of the net for a non-tensioning attachment,
or with round base lacing slides to make a flexible tensioning attachment.
more details
X
The tracks are usually fastened with #10 x 1 screws that are epoxied in to a
reinforced area of the hull (stringer or the hull deck joint), or they can be
through bolted to a backing plate. On aluminum beams they should be attached with
rivets. Fasteners should be attached on 8 centers for deck track and alternating
6 centers for hull track and the track should be set with a sealant/adhesive
to insure a solid bond with the boat. There are thin wall aluminum awning tracks
and plastic tracks available that will not work for nets, as they are not strong
enough and will open up under tension.
Offset Bar or Tube
By bolting an aluminum or wood bar through spacers to the hull so
that it is offset approximately 1/2" from the hull, you can create a
strong flexible lacing system. The size of pipe/bar and bolts depend
on the bolt spacing, 1/4" bolts and 3/8" x 1" Aluminum flat bar will
work with up to 8" spacing, 5/16" bolts and 3/4" stainless tubing are
good for up to 14" spacing.
Eye Straps/Pad Eyes
Stainless Steel eye straps can be attached with #10 screws to the
hull but should be placed no more that 6" apart. Pad eyes could be placed
further apart, up to 24" for a 1/4" padeye through bolted into a backing
plate. Both of these create stationary lacing points, where the net
must have a flexible lacing points or the lacing points on the net must
be made to match the locations on the boat. Also the further apart the
lacing points are spaced the more you will limit the types of lacing
patterns you can use.
Aluminum Beams
Often Cross beams on boats are made from mast sections that will have
an internal track extruded into them. The larger beams will usually
take a flat based slide while the smaller ones will take round based
slides. Any beam that takes a round based slide could also take a boltrope
border. Not all sail slides are suitable for net tensioning. Most of
the lower cost plastic slides are not strong enough, and will break
when stressed. Nets can also be laced entirely around the beam, although
that uses a lot more line and is more visible. With smaller beams,
mesh
nets can be made with sleeves that slide onto the beam. Mesh nets can
also be made to wrap around the beam and lace back to the net on the
under side, completely concealing the lacing.
Molded in tubes
This method must be built into the boat, but creates a strong fixed
attachment method that does not need any fasteners to be screwed into
the hulls. A plastic tube
is glassed onto the hull, then openings in the tube are routed out and
a smaller diameter stainless steel rod is inserted into the tube. The
net is laced through the cutouts around the steel rod.
Cables
If there is no rigid structure that the net can be attached to a suspension
cable will work. Cables do not offer as much support for the net as
a rigid structure, and the nets will not be as firm, but in many situations
this may be the only logical choice. Typically this happens on trimarans
where the bow net areas are not closed in with a Forward beam or in
the wing net areas where the Ama deck is significantly below the
beams.
Cables can be used here to support the net but they should be very
substantial.
more details
X
A 3/16 coated life line cable would be suitable for spans under 10 ft, and 1/4
cable would work on spans up to 20 ft. Cables should be attached to the boat with
pad eyes of equal strength to the cable through bolted to backing plates. When
nets are attached to cables they will form a catenary curve. The size of the loads
imparted on the cable from the net depend on the amount of curvature in the cable.
The greater the curvature the lower the loads. Larger loads on the cable result
in more deflection in the net. Cables that are tightened straight before the net
is tensioned will curve at least .3 per ft when the net is laced up. A firmer
net can be achieved by slacking the cables slightly and designing the net with
more curvature so the cable curves at .6 per ft when the net is tight. Nets can
be made so the cable is inserted through the webbing loops, eliminating any lacing
along this side. All cables should be covered somehow to protect the webbing from
chafing.